PomeConnect Activity
Adding a PomeConnect Activity
- Select the targeted Lab.
- Click "Edit".
- Navigate to the page where you want to add activities.
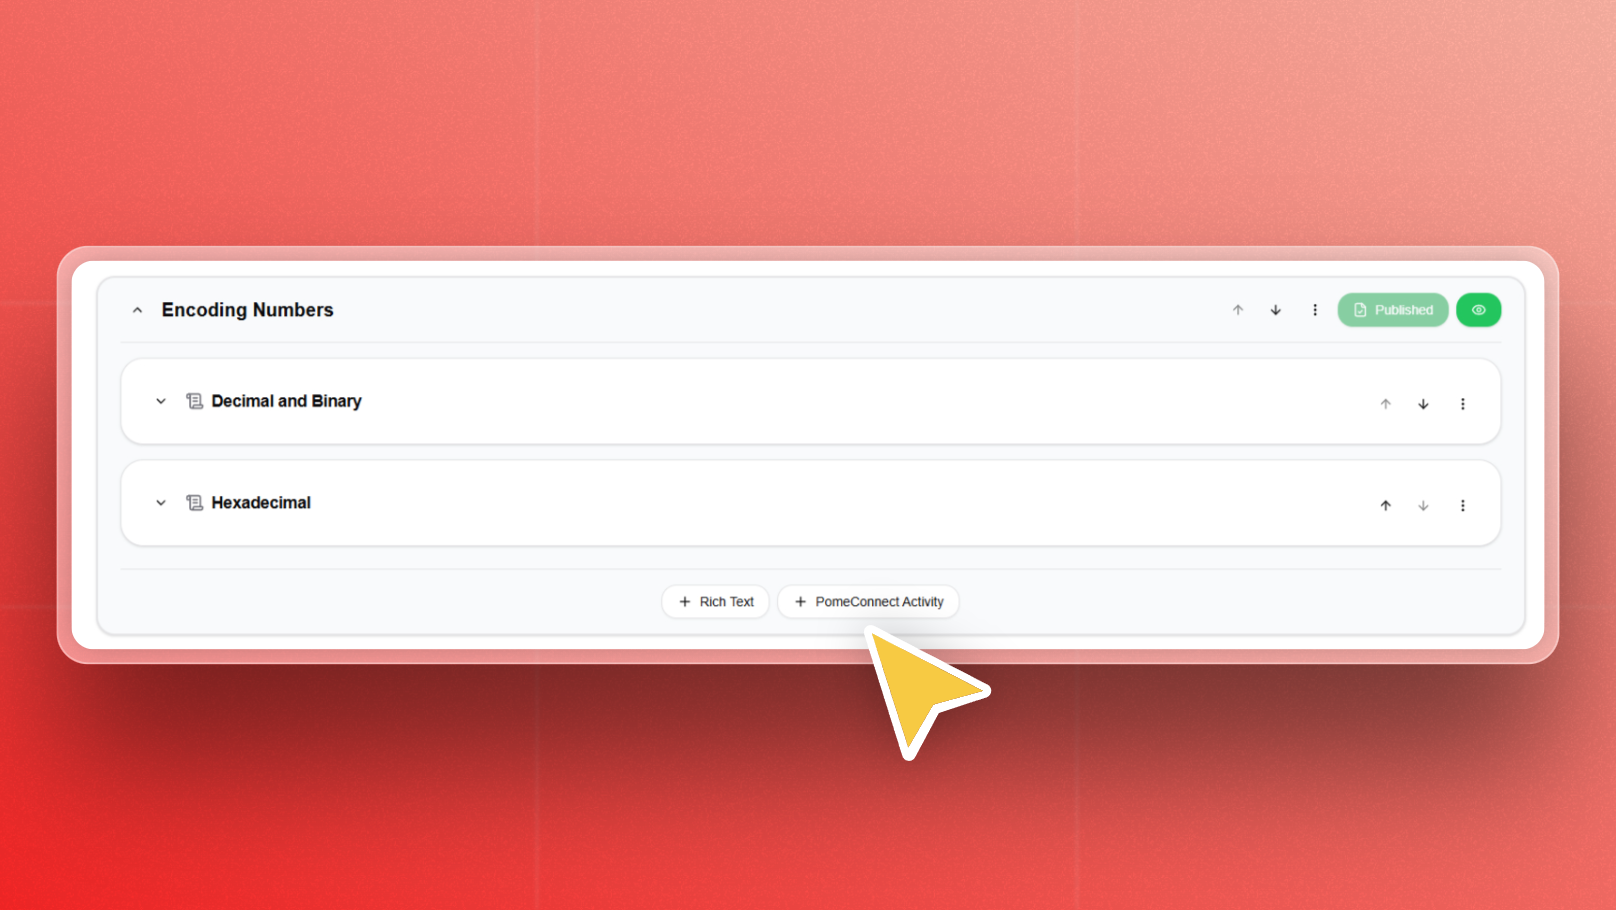
- At the bottom middle of the page block, click "+ PomeConnect".
- A form will appear.
- To update the activity title, hover over the title and click the edit symbol.
Authoring a PomeConnect Activity
Once you've created a PomeConnect Activity, the next step is to define its pedagogical content. This includes instructions, grading, feedback, and reference circuits that guide and assess learner interaction with the hardware.
Expand the activity form by clicking the down arrow located on the left, close to the activity title.
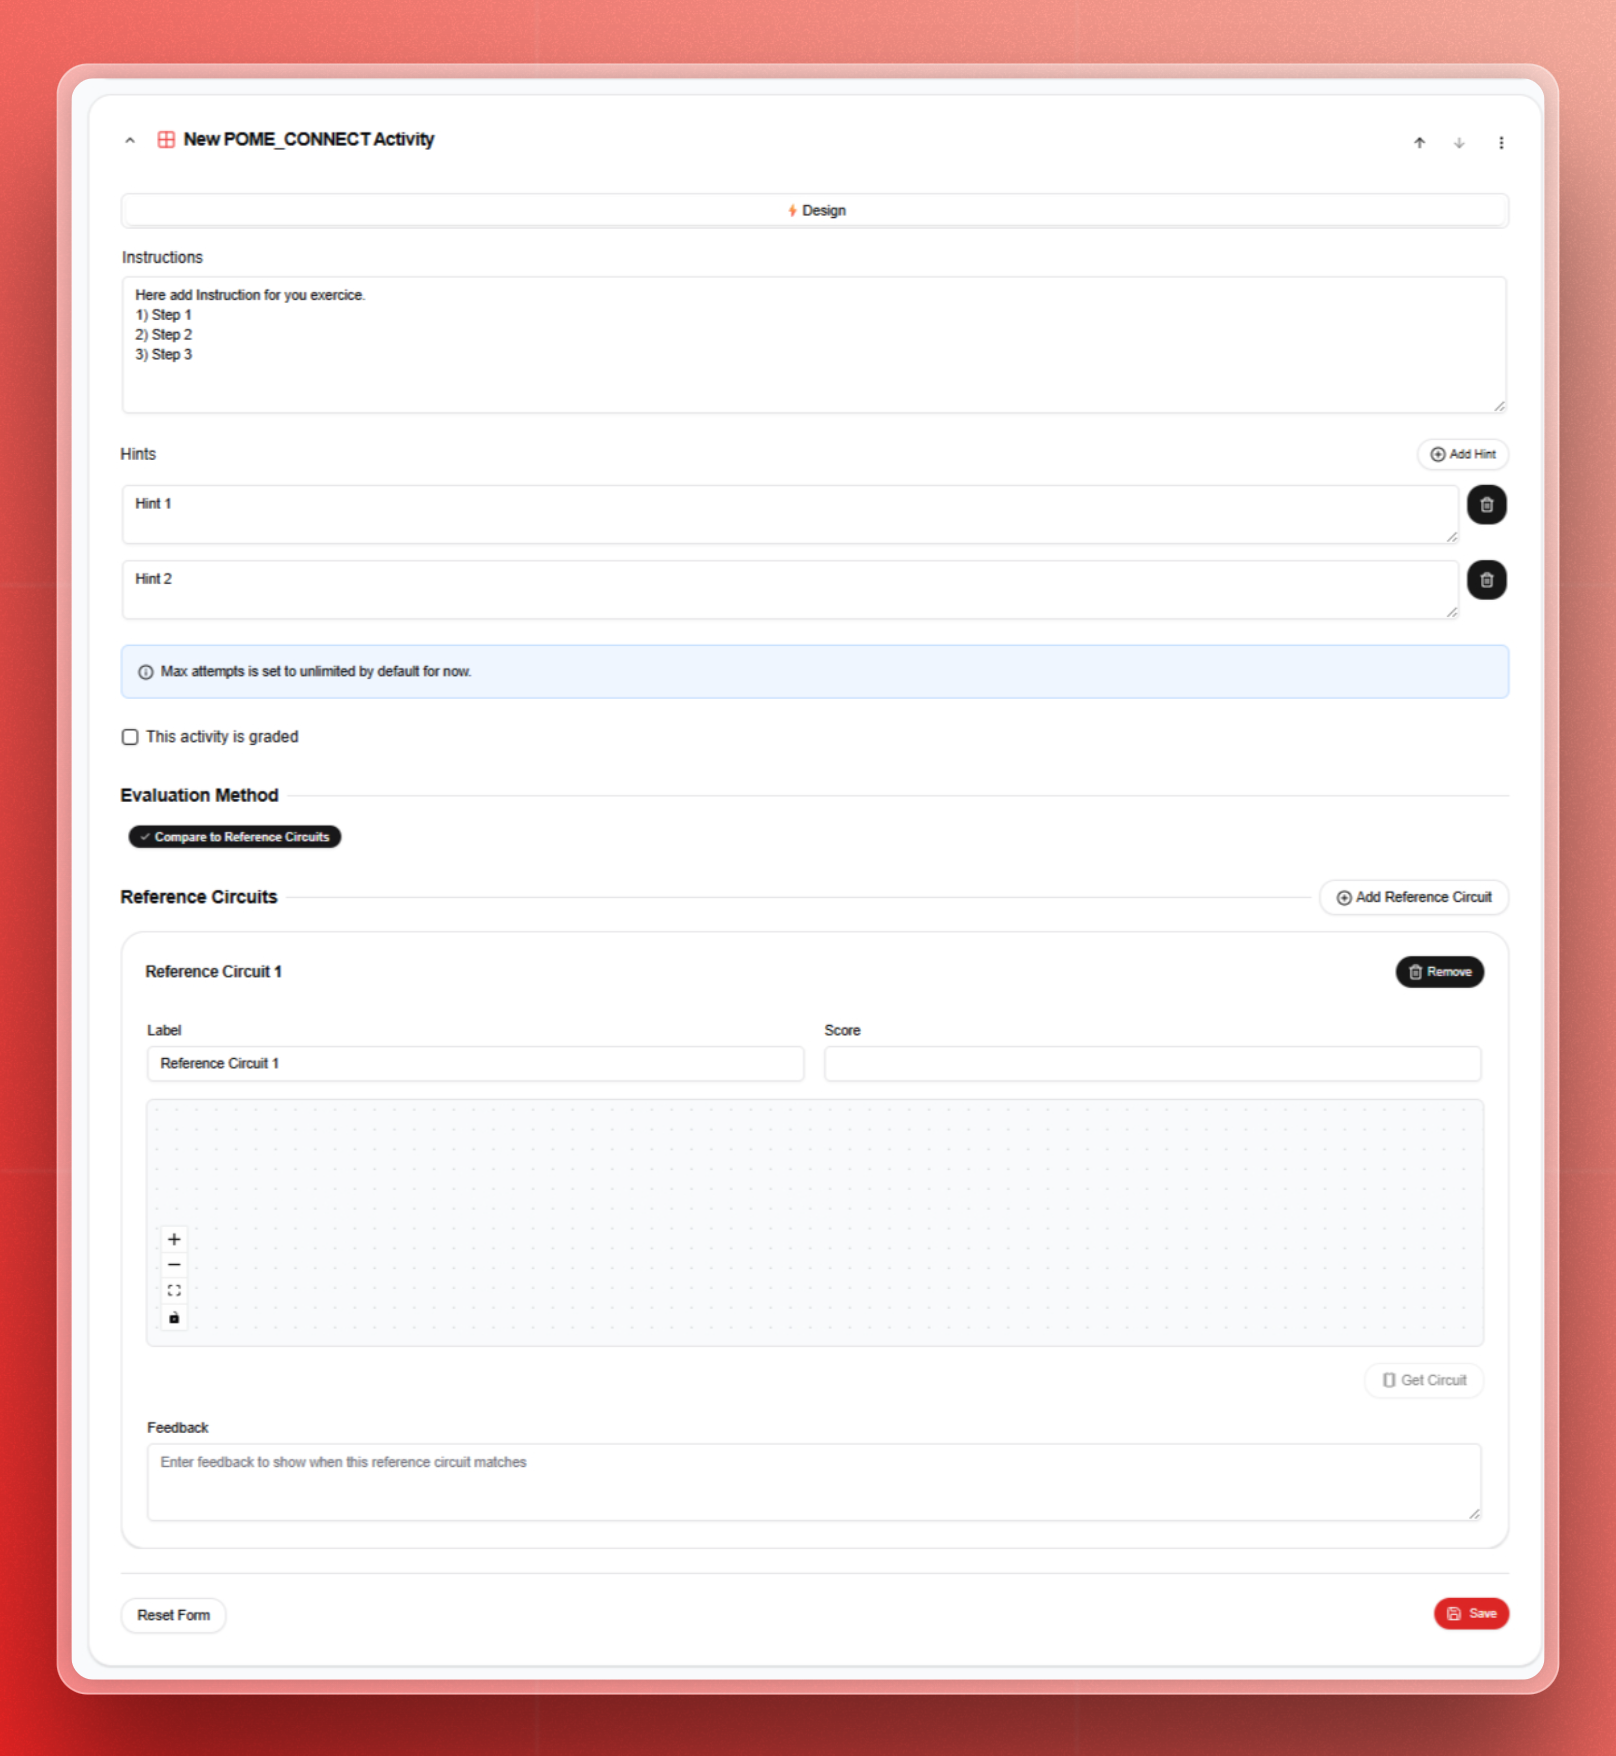
You will see a PomeConnect activity form to be filled in:
Instructions:
- Provide clear, concise guidance on what the learner is expected to build or test.
- Use numbered steps or bullet points to improve readability.
- Good instructions clarify:
- The objective of the circuit (e.g., "Build a basic NOT gate using one digital logic module.")
- Any required conditions (e.g., "Use a 1Hz square wave as input.")
Hints:
- Add one or more optional hints that learners can unlock if they need help.
- Hints should guide learners without giving the final answer.
- Use them to scaffold the thinking process (e.g., "Remember how a NOT gate inverts the signal.").
Graded Activity:
- Indicate whether the activity will be graded or not. If yes, tick the box "This activity is graded."
Evaluation Method:
- Choose the evaluation mode.
- Currently, the evaluation is based on the comparison with a reference circuit.
Reference Circuit:
- It is the model circuit that learners will be evaluated against.
- The system will use this circuit for automatic comparison, grading, and feedback.
To build a reference circuit:
- Select the necessary hardware modules.
- Ensure your master is connected.
- Build the reference circuit (responding to the assigned exercise) by placing the modules side by side in the correct sequence. The Master, as the power source and connecting module, should be the first on the left side.
- Click on "Get Circuit" (on the bottom right of the digital hands-on block).
- Indicate the "label" (name) of the reference circuit and its "score" to be automatically returned when the submitted circuit matches.
Feedback:
- In the feedback text zone, define what feedback learners receive when they submit their solution.
You can provide:
- Automatic feedback: Based on whether the circuit matches the reference.
- Custom messages: For correct and incorrect submissions.
- General tips: To help guide the learner if they submit an incorrect solution.
You can add as many reference circuits as you need by clicking “+ Add Reference Circuit” to the right of “Reference Circuits”.
You can remove any unnecessary reference circuit by clicking “Remove” to the right of its title.
Click “Save” to confirm and save the activity.